
Candle Fragrance Oils, Uncategorized
Why Is My Candle Tunneling?
Jun
Why Is My Candle Tunneling?
Learn why candles burn down the middle, leave wax on the sides, waste fragrance, and create a tunnel — plus how to fix tunneling in soy candles, paraffin candles, coconut wax candles, candle tins, and glass jar candles.
Quick Answer
Candle tunneling happens when the candle burns down the center instead of melting wax evenly to the edges of the jar. The most common causes are a short first burn, wick too small for the jar diameter, wrong wick type, poor wax/fragrance balance, candle burned for too little time, or a candle that was not properly tested. To prevent tunneling, choose the correct wick size, allow the first burn to reach near the container edge, trim the wick correctly, and burn test every candle formula before selling.
Table of Contents
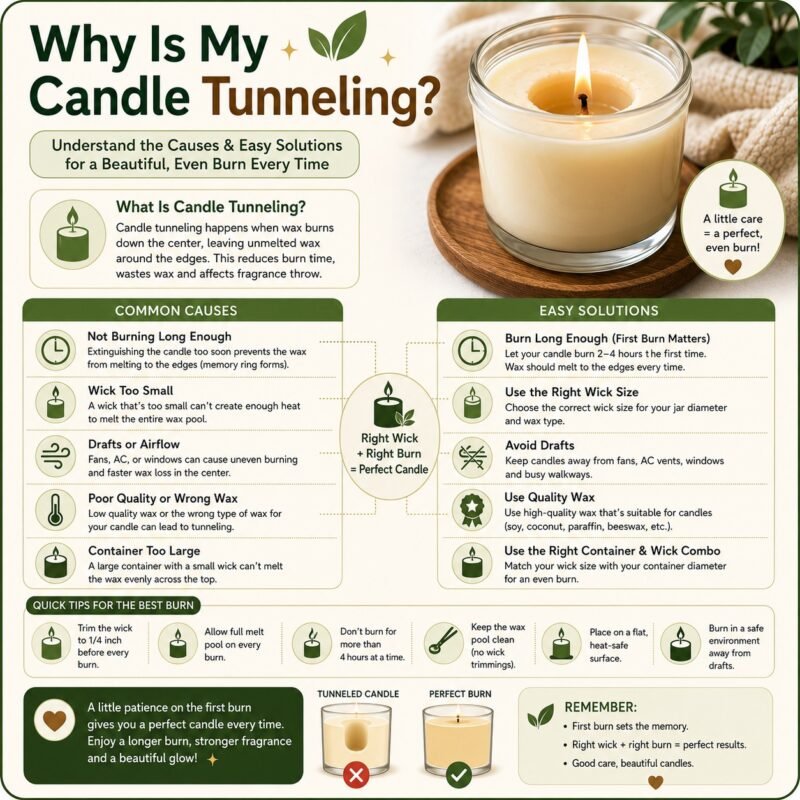
What Is Candle Tunneling?
Candle tunneling is when only the wax around the wick melts and burns downward, while a thick ring of unmelted wax remains on the sides of the jar. Instead of a wide melt pool, the candle forms a deep tunnel.
Tunneling wastes wax, weakens fragrance throw, shortens candle life, makes the candle look unattractive, and can eventually drown the wick if the flame becomes too low inside the tunnel.
For candle wax, fragrance oils, candle jars, tins, cotton wicks, wooden wicks, wick stickers, dyes, molds, labels, and packaging, visit Jindeal.com.
Main Causes of Candle Tunneling
Candle Tunneling Troubleshooting Chart
| Problem Seen | Possible Cause | Best Fix |
|---|---|---|
| Wax melts only around wick | Wick too small or first burn too short | Use larger wick and follow first-burn rule |
| Thick wax ring on jar sides | Insufficient melt pool | Retest wick size for jar diameter |
| Wick drowns in melted wax | Tunnel too deep or wick too weak | Remove excess wax carefully or remake with correct wick |
| Weak fragrance while burning | Small melt pool and poor hot throw | Correct wick and burn test again |
| Large flame but still uneven burn | Wrong wick type, jar airflow, off-center wick | Center wick and test different wick series |
| Candle tunnels after many short burns | Repeated short burn sessions | Burn long enough each time to widen melt pool |
| Wooden wick candle tunnels | Wooden wick too narrow/thin or poor trimming | Test wider wooden wick and trim correctly |
First Burn Rule
The first burn is very important for container candles. During the first burn, allow the wax to melt close to the edges of the jar. This helps create a wider melt pool and reduces the chance of a narrow memory ring.
| Jar Diameter | Approx. First Burn Planning | Goal |
|---|---|---|
| Small tin / small jar | 1 to 2 hours | Melt pool reaches close to edge |
| Medium jar | 2 to 3 hours | Even melt pool without overheating |
| Large jar | 3 to 4 hours | Wide melt pool and stable flame |
- Burn long enough to create a wide melt pool.
- Do not blow out a new candle after only 10 to 20 minutes unless testing requires it.
- Keep the candle away from fans, windows, and strong airflow.
- Trim the wick before each burn.
Wick Size and Jar Diameter
Wick size is the biggest technical reason for tunneling. If the wick is too small, it cannot melt the full wax diameter. If the wick is too large, it may create a large flame, black smoke, soot, fast burning, or overheating.
| Wick Problem | Signs | Correction |
|---|---|---|
| Wick Too Small | Tunneling, weak flame, poor hot throw, wick drowning | Test next wick size up |
| Wick Too Large | Large flame, smoke, soot, jar too hot, fast burn | Test smaller wick |
| Wrong Wick Series | Uneven burn despite size changes | Try different wick type for wax |
| Wick Off-Center | One side melts more than other | Use wick sticker and wick holder |
| Wooden Wick Too Thin | Small flame and center tunnel | Test wider/thicker wooden wick |
| Too Much Fragrance/Dye | Wick clogging or weak flame | Reduce additives and retest |
How to Fix a Tunneling Candle
If your candle has already started tunneling, you may be able to improve it depending on how deep the tunnel is.
1. Foil Method
Wrap aluminium foil around the top edge of the candle, leaving an opening around the flame. This traps heat and helps melt wax around the sides. Watch carefully and do not leave the candle unattended.
2. Heat Gun Method
Use a heat gun carefully to melt the top wax surface evenly. This is useful for makers fixing test candles or display candles. Avoid overheating the jar.
3. Remove Extra Wax
If the wick is drowning, carefully remove some excess wax around the wick so the flame can breathe again. This is a temporary fix, not a formula solution.
4. Longer Controlled Burn
If the tunnel is shallow, a longer controlled burn may help widen the melt pool. Always watch the candle and follow safe burn time.
5. Remake the Candle
If tunneling is severe, the best solution is to remake the candle with the correct wick size and test again.
How to Prevent Tunneling Before Selling
Burn Testing Checklist
Before selling candles, burn testing is necessary. A candle that looks good may still tunnel, smoke, overheat or give weak fragrance while burning.
| Test Area | What to Check | Pass Sign |
|---|---|---|
| First Burn Melt Pool | Wax melts evenly close to edges | No deep tunnel |
| Flame Height | Stable flame, not too high or too low | Controlled flame |
| Wick Position | Wick remains centered | Even melt pool |
| Hot Throw | Fragrance while burning | Noticeable aroma for room size |
| Smoke / Soot | Black smoke or soot on jar | Minimal soot after correct trimming |
| Jar Heat | Container temperature | Does not become dangerously hot |
| Wax Left on Sides | Check after every burn cycle | Minimal hang-up or controlled wax residue |
| Full Burn Life | Burn from top to near bottom safely | No drowning, overheating or tunneling |
Common Mistakes
1. Using a Wick That Is Too Small
This is the most common maker-side reason for tunneling.
2. Short First Burn
Blowing out the candle too early can create a narrow melt pool memory.
3. Not Testing Jar Diameter
One wick size does not work for every jar.
4. Changing Fragrance Without Retesting
Different fragrance oils can change wick and burn performance.
5. Too Much Dye
Excess dye can affect wick performance and burn quality.
6. Wick Not Centered
An off-center wick can burn one side and leave wax on the other side.
7. No Customer Burn Instructions
Customers need instructions for wick trimming, first burn and safe burn time.
8. Burning Near Fan or Window
Airflow can create uneven burning and poor melt pool.
9. Judging Only Cold Throw
Candle performance must be checked while burning, not only by smelling the unlit jar.
10. Selling Without Full Burn Test
Every candle size and formula should be tested from first burn to near the bottom before selling.
FAQ
1. Why is my candle tunneling?
Candle tunneling usually happens because the wick is too small, the first burn was too short, or the candle was not burn-tested correctly for the jar size.
2. Can candle tunneling be fixed?
Shallow tunneling can sometimes be improved with the foil method, heat gun method, or longer controlled burn. Severe tunneling usually needs reformulation or rewicking.
3. What is the first burn rule?
On the first burn, allow the wax to melt close to the container edge to create a wide melt pool and reduce tunneling risk.
4. Does wick size cause tunneling?
Yes. A wick that is too small cannot create enough heat to melt the full candle diameter.
5. Can too much fragrance oil cause tunneling?
Too much fragrance oil can affect wick performance and burn balance, which may contribute to tunneling or poor burn quality.
6. Why does my soy candle tunnel?
Soy candle tunneling can happen due to a small wick, short first burn, wrong wick type, poor cure time, or fragrance/wax mismatch.
7. Why does my wooden wick candle tunnel?
The wooden wick may be too narrow, too thin, poorly trimmed, or not suitable for the wax and jar diameter.
8. How long should a candle burn the first time?
It depends on jar size, but the goal is to create a melt pool close to the edge without overheating the container.
9. Can I use a heat gun to fix tunneling?
Yes, makers often use a heat gun carefully to level wax tops, but avoid overheating the jar or fragrance.
10. Why is fragrance weak in a tunneling candle?
A small melt pool releases less fragrance, so tunneling can reduce hot throw.
11. Should I use multiple wicks in a wide jar?
Some wide jars may need multiple wicks, but this must be burn-tested carefully for flame, heat, soot and safety.
12. Can tunneling make a candle unsafe?
Severe tunneling can drown the wick or lead to poor burn behavior. Damaged, unstable or overheating candles should not be used or sold.
13. Does trimming the wick help tunneling?
Wick trimming helps stable burning, but if the wick is too small, trimming alone will not fix the candle design.
14. Can candles cure stress or insomnia?
No. Avoid medical claims. Candles can be described for aroma, ambience, decor, gifting, spa-style mood and home fragrance.
15. Where can I buy candle making supplies?
You can buy candle wax, fragrance oils, essential oils, jars, tins, cotton wicks, wooden wicks, wick stickers, dyes, molds and packaging from Jindeal.com.
Final Words
Candle tunneling is usually caused by short burns, wrong wick size, poor wick selection, or untested wax/fragrance/jar combinations. The best solution is proper first burn, correct wick testing, controlled fragrance load, centered wick placement, and full burn testing before selling.
For candle wax, fragrance oils, jars, tins, wicks, dyes, molds, labels and packaging, visit Jindeal.com.
Shop Candle Making Supplies on Jindeal.com
Buy soy wax, paraffin wax, fragrance oils, essential oils, candle jars, tins, cotton wicks, wooden wicks, wick stickers, candle dyes, silicone molds and packaging materials from Jindeal.com.